Late last year, I decided to take a woodworking class at Palomar. It is something I've
always been interested in -- and since I wasn't working, it seemed like a good time to try it out. I signed up for
the Fundamentals of Woodworking class. George is also taking the class -- and he (and his workshop) have been a big help
with many parts of my project.
This document is serving both as my project summary which will get turned in at the end of the
semester -- and my personal web page so that my friends and family can check in on my progress! This means my
friends and family may read technical details they could care less about... and my teacher, Russ Filbeck, will find out
how many mistakes I had to fix. Oh well... I probably wouldn't have learned nearly as much if
I hadn't botched so many operations the first time!
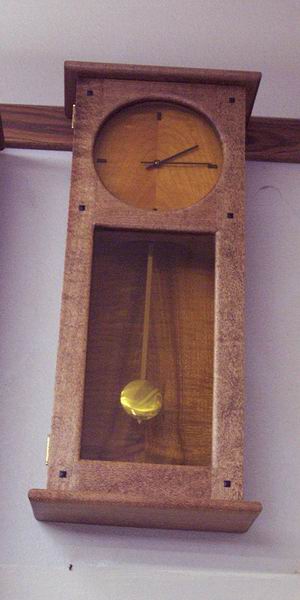
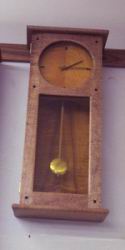
In the beginning woodworking class, everyone builds a clock. The school provides four different
clock plans to choose from (or you can provide your own). I chose the Shaker style wall clock shown below.
I will make the clock carcass from oak; the back and dial board from sycamore. I really wanted to make the entire
clock from sycamore, but at the time I was buying wood all the sycamore looked warped and split and difficult to
deal with. Being a rank beginner, I decided I didn't need that added complexity. Maybe my next clock will
be just sycamore.
|
|
Jan & Feb
The class started in late January. The first few weeks of class included lectures on wood technology,
picking lumber, sharpening chisels -- and a safety test on the shop equipment we would be using.
Being a complete novice, reading the safety manual was both confusing and terrifying. Who knew there
were so many ways to get hurt on so many pieces of equipment that I'd never heard of before! Needless to
say, I passed the test and was soon let loose in the shop.
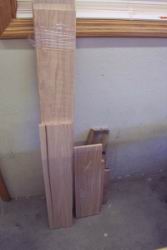
Picking the lumber...
I spent no less than an hour agonizing over lumber. In its raw state, it is difficult to see how
it will appear in a finished piece (at least for beginners it's difficult). I finally settled on oak -- it will
match most of the other furniture in my house and the oak available had some beautiful grain.
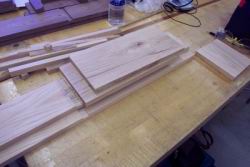
Laying out the clock pieces...
The next step was to chalk out on the raw lumber how I would cut the stock to make
my clock. This step was even more agonizing than buying the lumber. I really wanted
the finished clock to show off the wood to its best advantage. I finally settled on
pieces with nice cathedral points for the sides, bold vertical stripes for the door stiles and
bold horizontal stripes for the door rails. The top, bottom and pendulum shelf would have some interesting figure
as well. I would later buy sycamore for the back and dial board.
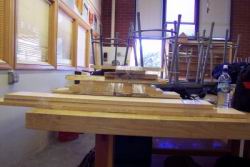
Preparing the lumber...
The next order of business was to surface the lumber and make it square. I used the jointer to create
one flat face and one flat edge. I then thickness planed each board to create another flat face and
to get the stock to 3/4" thick. Next... the dreaded table saw to square the ends and cut the final
edge.
Conquering the table saw...
I literally had nightmares for the week before I had to use the table saw. Of all the equipment in
the lab, this seemed the most likely to cause personal injury. I had heard too many horror stories
of kickback and injuries, and I really had trouble working up the nerve to use it. Alas, I eventually
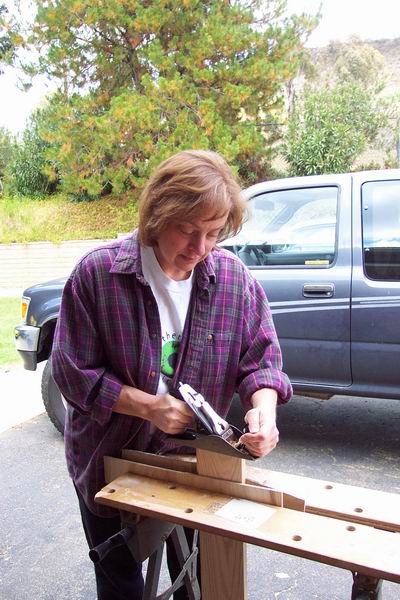
had no choice, and after much procrastination I got Phil (the worldest greatest Teaching Assistant) to
step me through the process. I lived to tell AND managed to cut the pieces of my clock carcass to size.
Documenting the process...
In mid-March, it occurred to me that I should be documenting this process... and so I started
taking frequent pictures of my project. So, here's how it went from there...
|
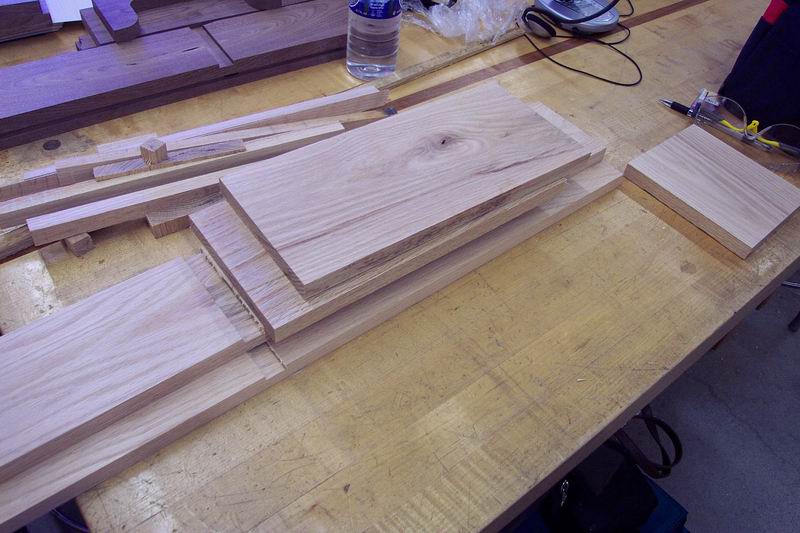
March 14.
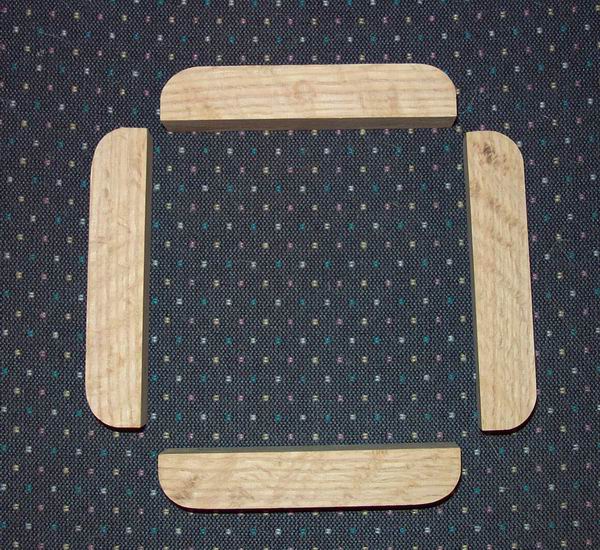
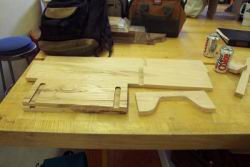
By mid-March, I had completed the following:
- Jointed stock to get one flat face and edge
- Planed stock to desired thickness (well, close... who knew you needed a math degree to read a pair of calipers)
- Squared up stock on the table saw and cut the sides, top and bottom to size.
- Routed the through dados in the sides (where the pendulum shelf will be inserted)
|
|
|
|
March 21.
Today, I was all fired up to get a LOT done because we were
going to have a full working day in the lab. Normally the day is part lecture, part lab, but
this week Russ (our teacher) was on a woodworking trip to Japan. What I hadn't realized was that my trusty TA Phil was also gone.
We had a substitute teacher -- but alas, I couldn't seem to get any help. This led to a valuable and
painful lesson -- just because someone sounds like they know what
they're talking about, doesn't mean they do. Almost every time some student in the class (besides
George) has tried to "help" me, I have ended up messing up whatever piece I'm working on. Today,
I managed to mess up the stop dado in my clock's top.
The substitute teacher told me how to repair it, but it put me even further behind schedule.
Today's progress:
- Consumed no less than 6 Diet Cokes and 6 Ibuprofen
- Routed stop dado in top and bottom (still need to complete repair)
- Cut pendulum shelf to length on the table saw and used the band saw to cut out
the area for the pendulum to swing. Used the spindle sander to smooth out the cut.
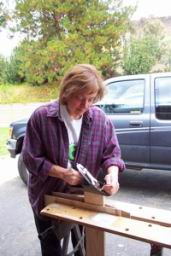
- Learned to sharpen chisels. Learned not to test them for sharpness by running your
finger along the edge. Learned where they keep the band-aids.
|
|
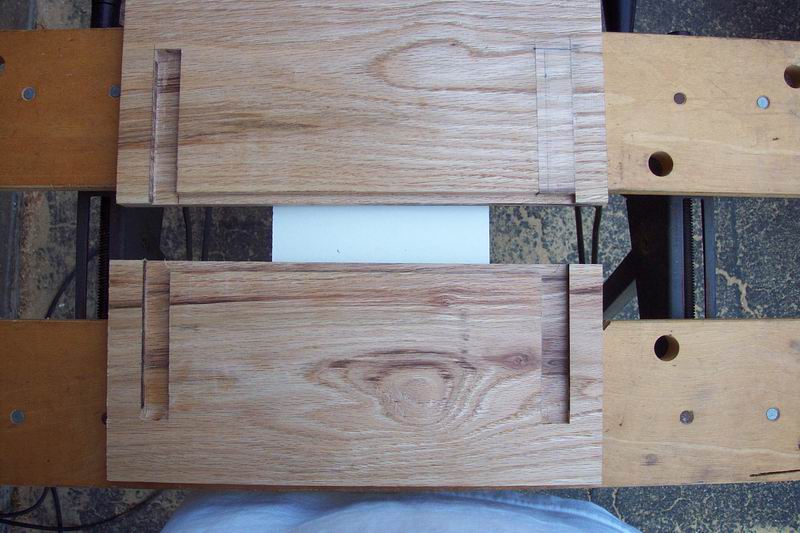
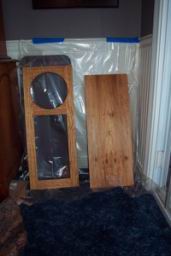
March 28.
This week was Spring break at school, so
we didn't have class. During the week off from school, George and I
built a router table and fence for his workshop.
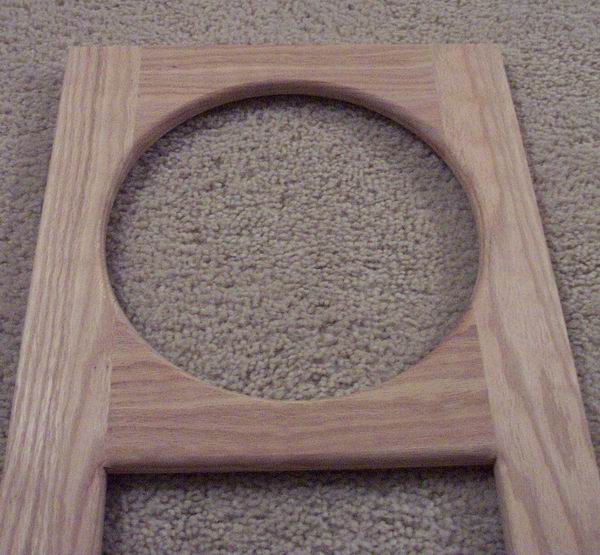
Then I began the (numerous) repairs required on my clock.
In the picture below, I have patched the
right dado in the clock top (upper piece). When I cut the dado, the stock had not been secured
well enough to the table allowing it to wander during the routing operation... resulting in a dado that
veered off to the left.
I squared the dado out with my chisel, cut a patch and glued it in. Then (using George's new
router table) rerouted the dado.
|

|
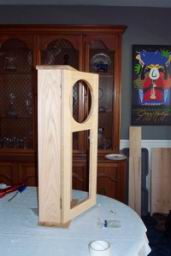
April 4.
I'm getting further and further behind! I spent most of the
class sharpening chisels. Geez. Why don't they just come sharp when you buy them???
|
April 11.
Almost did some woodworking today! I am so
far behind in my clock (but it's not a race... at least that's what Russ said at the
beginning of the semester... back when I wasn't hopelessly behind!).
Today's progress:
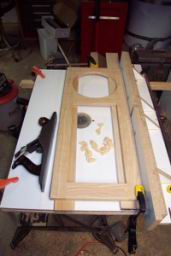
- Dry fit my clock carcass and measured for the door. I can't do the glue up yet
because I still need to finish a repair.
- Laid out my clock door pieces... ready to cut now.
- Guess what? Worked some more on those dang chisels.
|
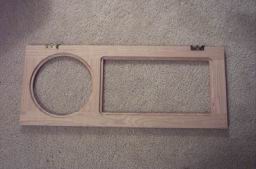
April 18.
Finally - did some workworking today!
Today's progress:
- Finished jointing the stock to use for my door.
- Used the table saw to cut all my door pieces to size (well, I left them
a little oversized... the final cut is made when the door is fit to the carcass).
|
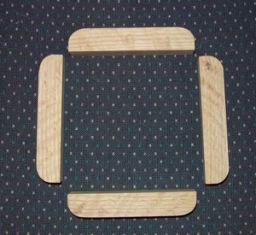
April 25.
Very little progress in class -- but
got a lot done over at George's this week.
This week's progress:
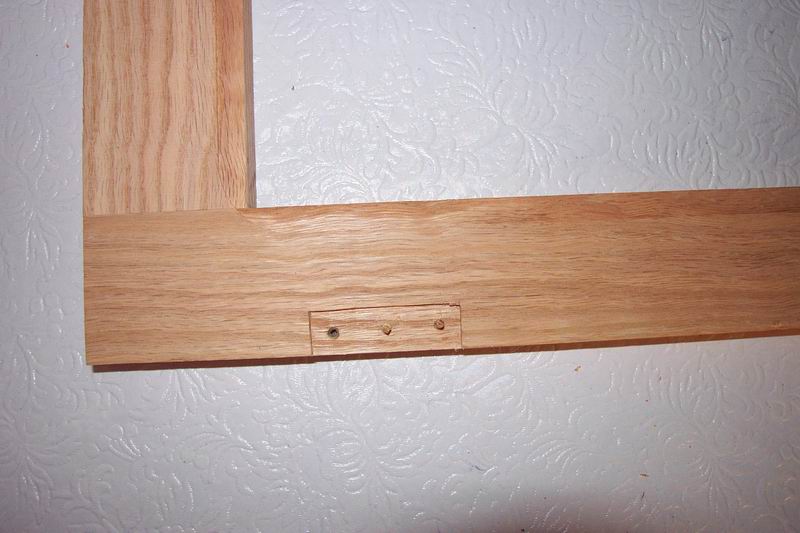
- Finished repairs to my clock. Yay! When I thicknessed the stock that I used for
my sides and my pendulum shelf, I had undersized them slightly (not on purpose of course!). This
meant I had a sloppy fit into my dados (which I did not undersize). So in order to get a good
tight fit, I cut some veneer strips and glued them on in the area that would fit down
inside the dados. Then I planed and sanded the strips so that they were flush with the edge.
I also glued some veneer strips onto the pendulum shelf as (alas) it too had been a little undersized and
did not fit nicely into the dado.

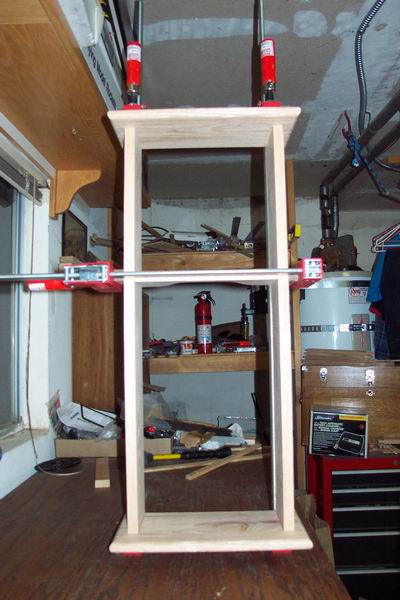
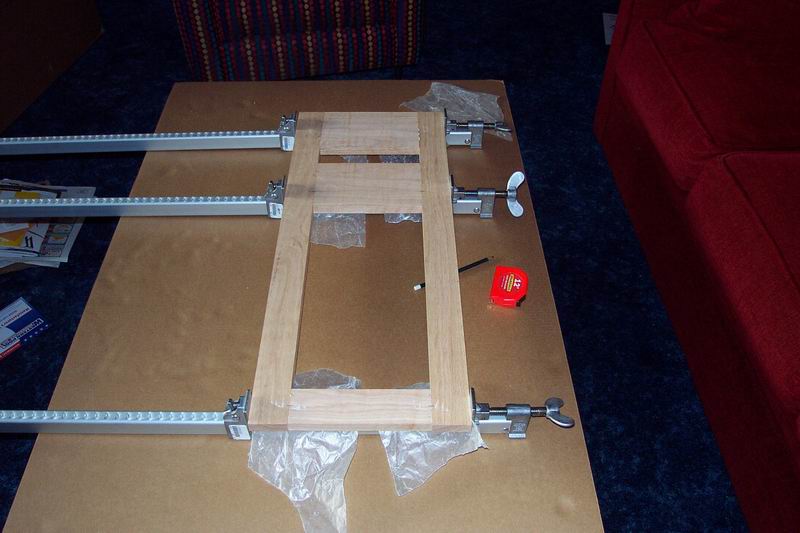
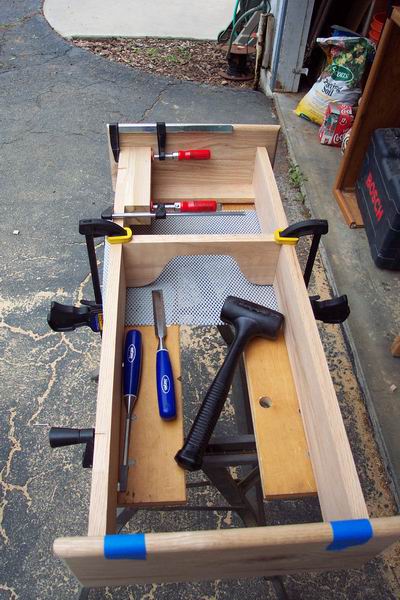
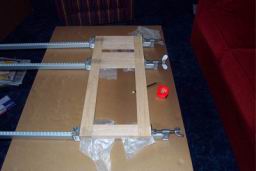
- Glued up on my carcass! Another big YAY! It's actually starting to look like a clock carcass!
I couldn't have done this step without George. Even the
simplest glue-up can strike fear in your heart as the glue starts to set and you realize you're still not square!
In order not to have too much panic during
the glue-up, we decided to do it in two stages. First we glued in the pendulum
shelf and just dry fit the top and bottom so that we could square up the carcass. After that
was dry, we glued up the top and bottom.

- Glued up my door, too. Now we're really cooking!
- Installed the hanger. I made the hanger piece which will allow me to hang the clock on the wall.
It is glued in place in the upper part of the back opening. I cut rabbets in it that allow it to slip in
flush against the clock carcass, and allows the clock back to fit in flush against it. Alas, no pictures.
|
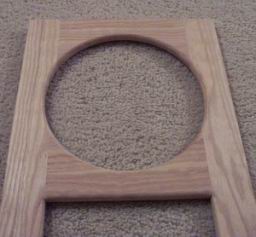
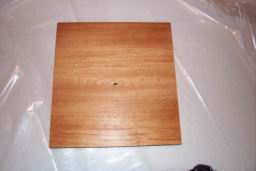
May 2.
Got an amazing amount done in class today.
I guess it helps to go in with a check list.
This week's progress:
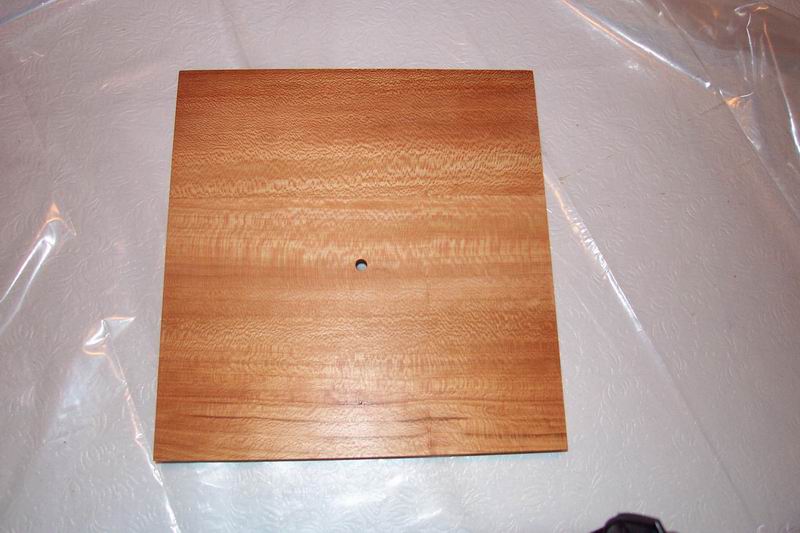
- I resawed some sycamore using the band saw. Resawing involves cutting
the stock in half lengthwise. This allows me to bookmatch the two pieces to create
an interesting (and somewhat symmetrical) grain pattern for my back and dial board.
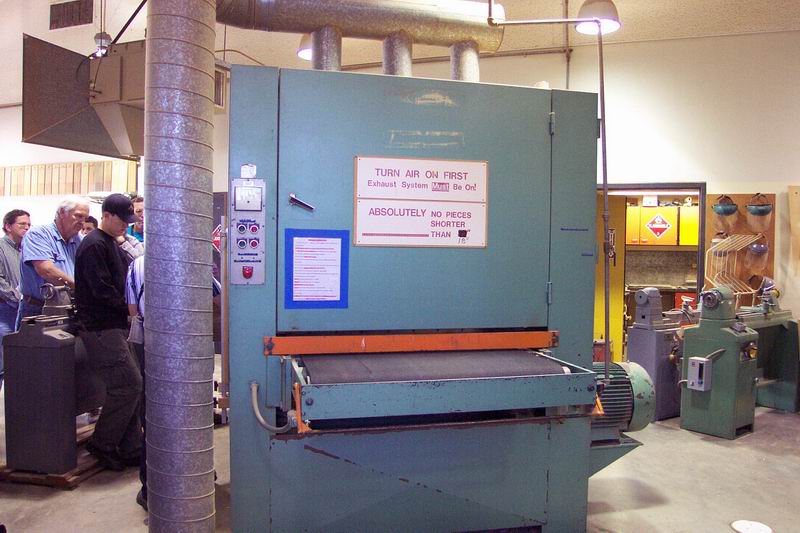
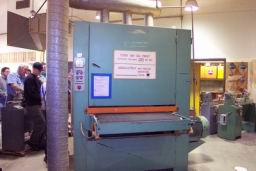
- I ran my door through the big drum sander.
- I fit 3 sides of my door to the clock carcass. The fourth side (the long side opposite
the hinges) is fit after the door is hung on the hinges (in case something shifts!).
|
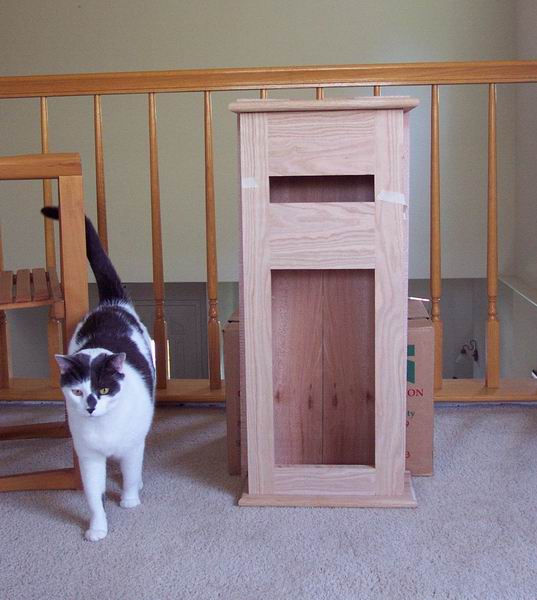
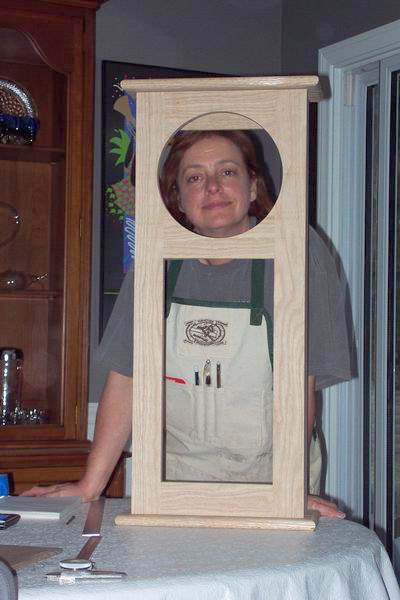
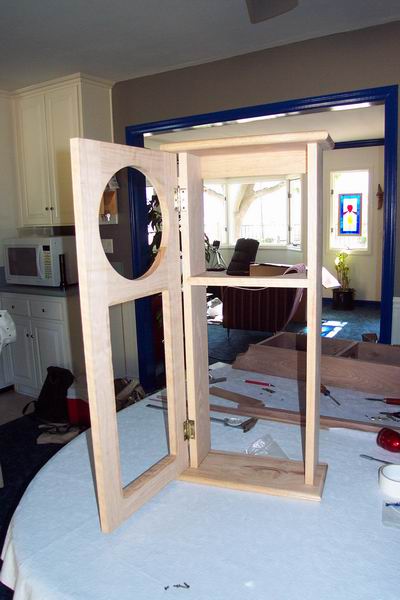
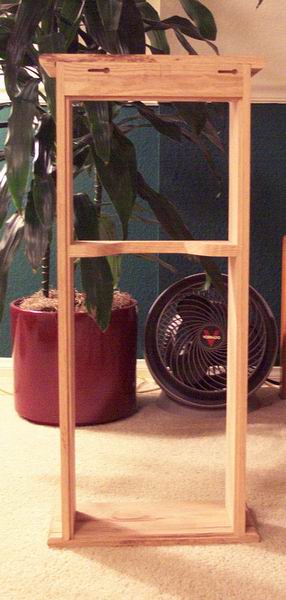
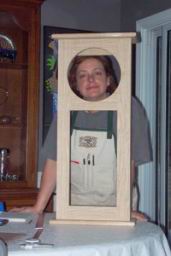
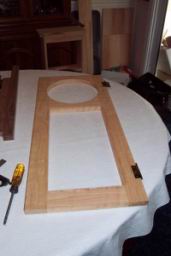
It's really starting to look like a clock here. You can see the bookmatched sycamore on
the back wall of the clock.
Of course, the back isn't actually attached... and the bookmatch isn't actually glued yet...
and the door is hung with masking tape... and I haven't cut the hole for the clock face yet,
but other than that, it's starting to look like a clock!
|

|
At George's house, I got even more done...
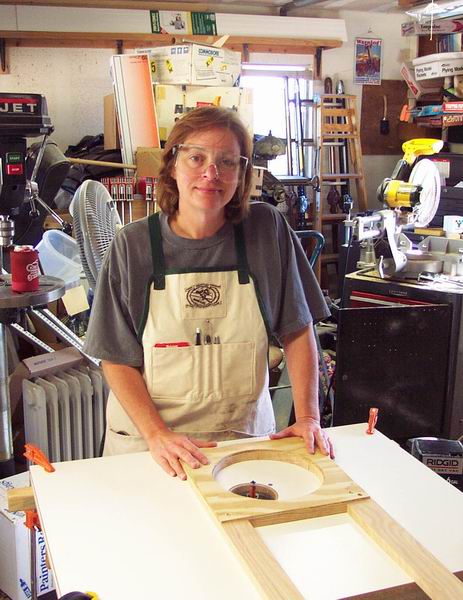
- George and I made a circle jig to make it easier (and foolproof) to cut the circle for my clock dial.
I was really concerned about my ability to create a perfect circle with a jigsaw and a sander.
Instead, we decided to cut the perfect round opening in a piece of plywood, and then
(assuming we ended up with the perfect round opening) use that as a guide for the router bit to cut the circle in
my door.
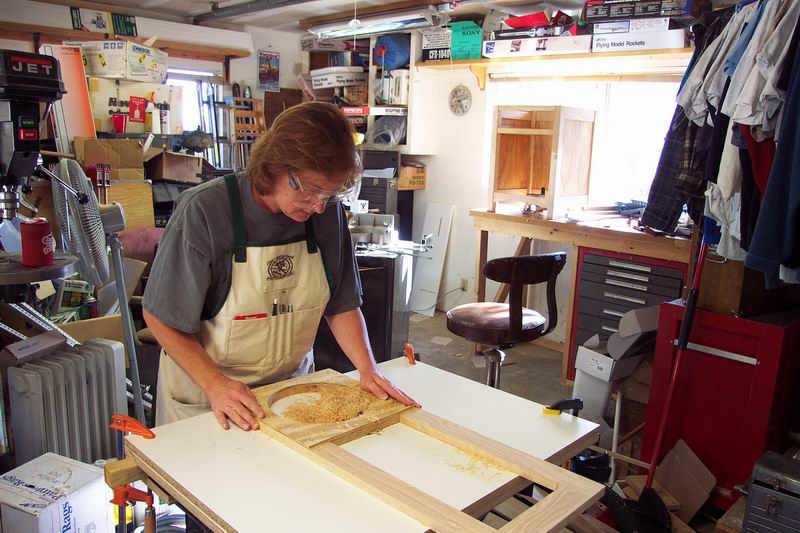
- I rough cut the circle on my actual door using the jigsaw - being very, very careful to stay away from the line
where I had drawn the circle.
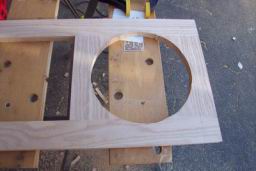
- Then I routed out the rest using the jig as a guide. Worked perfectly -- and very low stress. At this point, I did
not want to risk having to make another door!


- Voila!
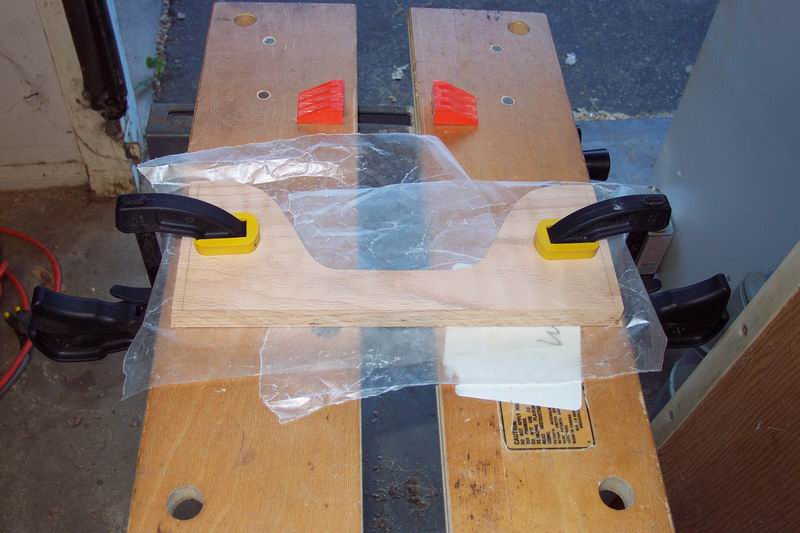
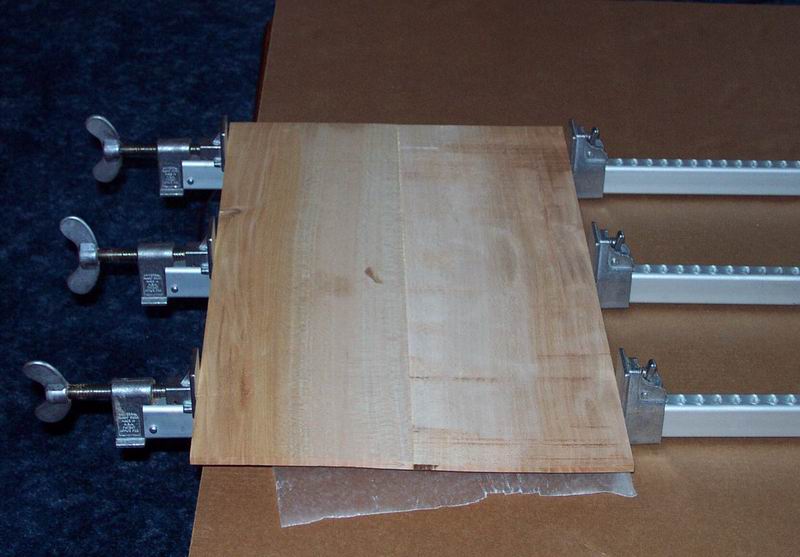
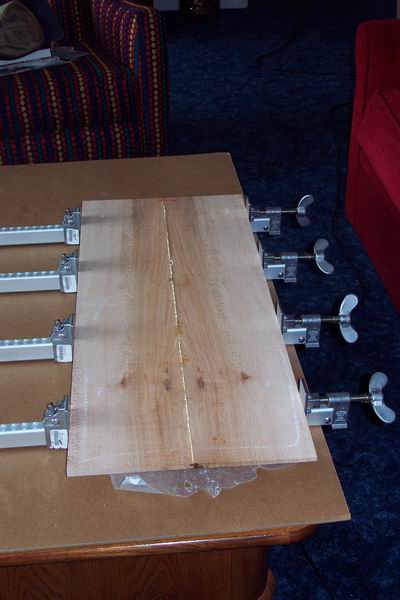
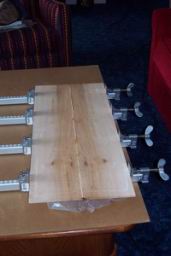
- I glued up my dial board and back.

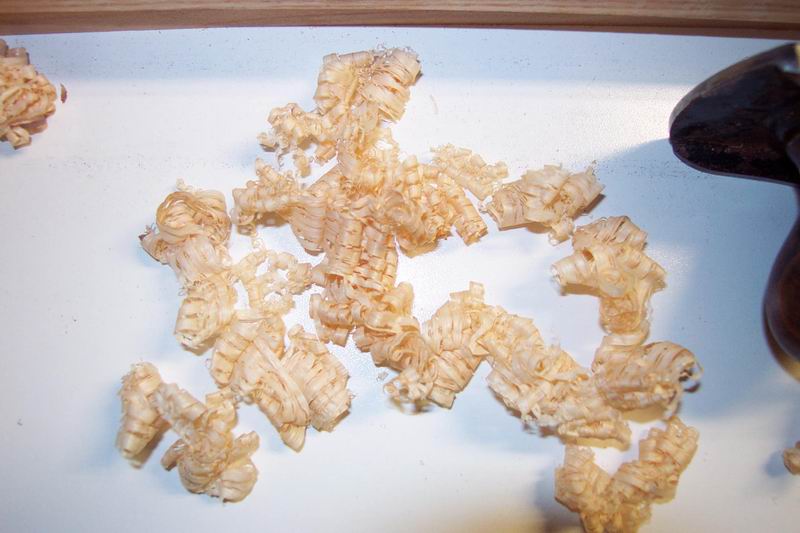
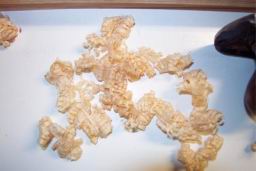
- I planed the hinge side of my door a little, as I wasn't quite happy with the fit. Check out that pile of plane shavings!
- I cut hinge gains in my door and installed the hinges. I also cut hinge gains in the carcass, using a
backer board so that I didn't break through my carcass wall.

- Alas, I wasn't quite happy with how the door hung, so I plugged the screw holes for the hinges with
toothpicks and decided to try again.

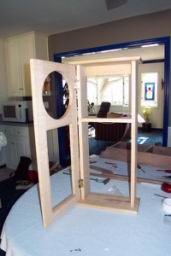
- Yee ha! I've got a door!
|
May 9.
Got lots done in class today, too. It's getting close to done.
This week's progress:
- Scraped the glue squeeze out from the back and dial board and ran them through the drum sander
to get them to final thickness.
- Ripped the back and dial board to final width using the table saw. Then used the cross-cut sled
to cut them to final height. The dial board is a little big, but I will finish it with a hand plane.
- Cut a long 3/4" x 3/4" strip to use for my dial board braces. I'll finish them at George's house.
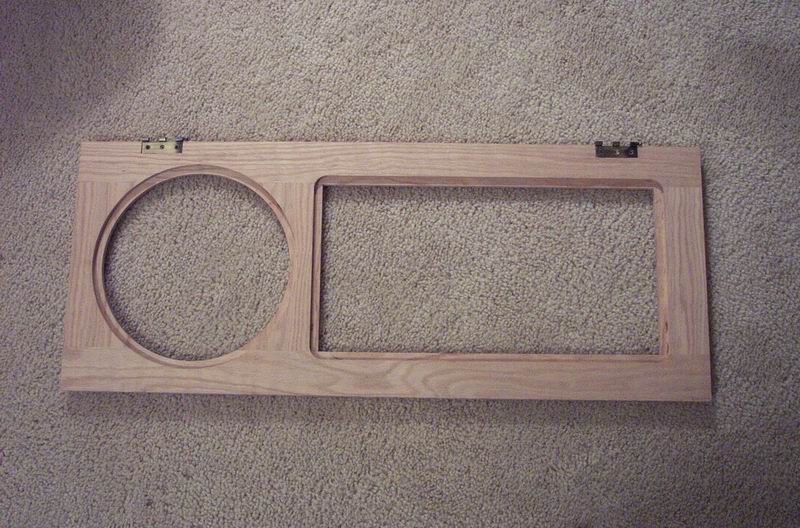
- Routed the rabbets in the back of the door to make the opening for the glass.
At George's house, the progress continued:
- Cut my dial board braces to size and used the router to apply a 1/2" roundover to the ends. These don't really need a
decorative edge because they are hidden between the dial board and the clock back, but I still thought
it would look cool.
- Planed my door to final size. The hand plane is cool!
- Used the router to apply a 1/8" roundover edge to the outside edges of my door and a
3/8" roundover to the inside edges of the circle and rectangular opening in the door.
- Drilled keyhole slots in the hanger bracket. They look lopsided in the picture, but they're really not.
They are engineered so that the screws that hold the clock will be equi-distant from the sides of the
clock once it is in its final resting spot on the wall.

|
May 23
A lot got done in the final couple of weeks of class.... the result -- a clock!
Here's what got accomplished in the final weeks...
- Glued the dial board braces in place
- Drilled a hole for the clock movement and test mounted it on the dial board
- Installed the door magnets (I decided to put one at the top and one at the bottom
given that the door was so massive. The fact that the door was a little bowed and doesn't
quite touch the carcass in the middle had nothing to do with this decision... really!).
- Cut the glass.
- Used George's handy little circle gig to cut a circular retainer to hold
the glass in place over the dial area. Also made a rectangular retainer to hold the glass in
place in the pendulum area.
- Put it all together to see how it looked. Awesome! I decided that I probably wasn't going
to put numbers on the clock face, because I think it's perfect just as it is.
- Removed all hardware so that I could sand and oil finish everything.
- Sanded everything.... over and over and over. Ugh!
- Applied the first coat of oil finish. Woo hoo! The wood looks awesome!
- That's all I had time to do before the final class on Thursday the 23rd, so I put
it all back together and brought it to class. Here's George's and my clock (and yes -- it
was 12:30 am on the night before the clocks were due!).

|
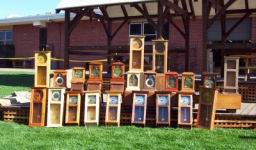
All done!
Here's the class picture of all the clocks. Pretty cool! Mine is in the back row, just
about in the center, and George's is in the front row just below mine. Of course, ours are the
two coolest clocks in the class!
|
|
|
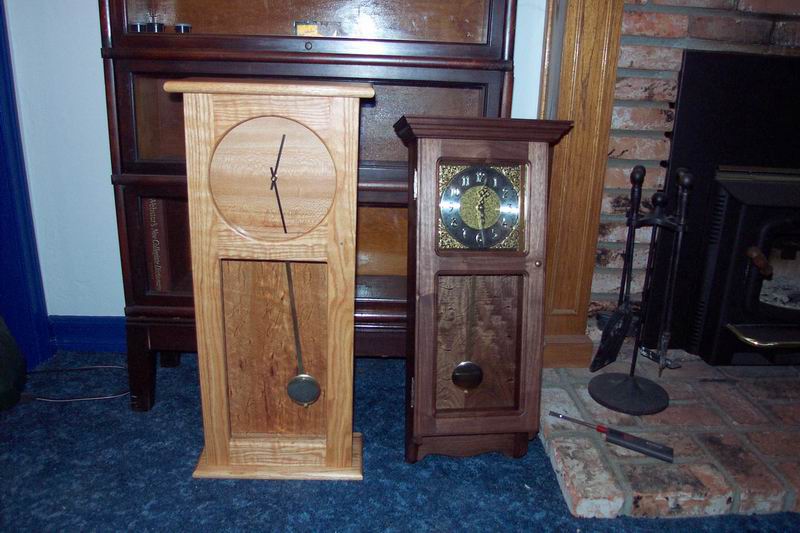
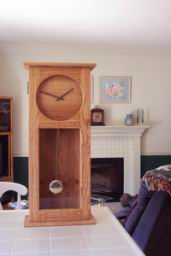
Here's a close up of mine at home. After this, I had to take it all apart again
and sand in two more coats of oil -- then apply two coats of wax. But - now it is truly done. I just need to
figure out where to hang it.
|
|